Continuing from Part 2 of this series, I finally have photos of the new desk. Actually it has been finished for awhile now, but I’ve been reluctant to show photos of it because my studio space is nowhere near final. So, don’t mind the clutter:
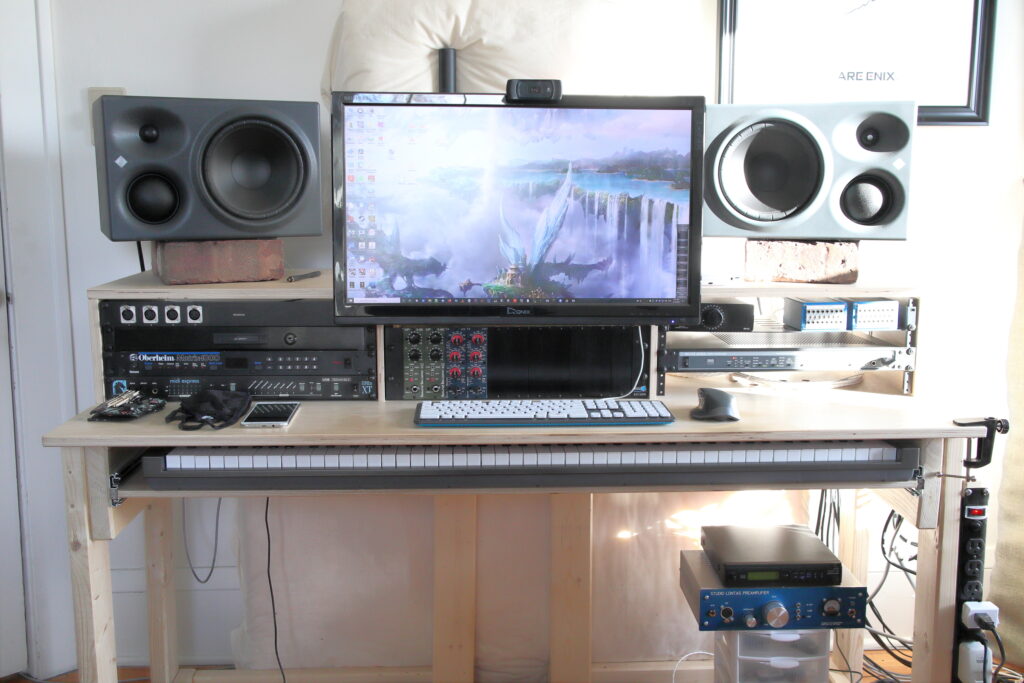
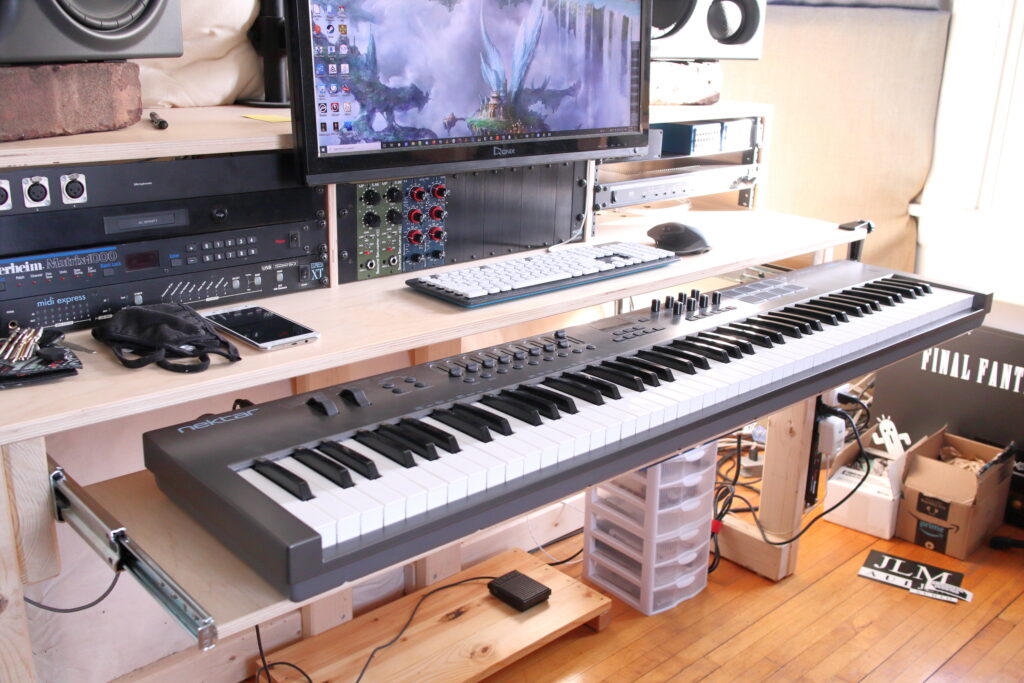
There are a lot of things I like about this desk, and amazingly, it meets all of my stated goals from the previous article. All of the critical controls are easily within reach. The desk is acoustically transparent–something that even commercial desks have never accomplished to my knowledge. The retractable keyboard tray sure is nice. And this is not obvious from the photos, but there are a ton of cables bundled up into cable hooks behind the desk–the cables you see are only a fraction of the rat’s nest that would be if there was no cable management! Still, there are some things I wish I had done differently.
But first, how did I make the desk acoustically transparent? In short, by having such a shallow main work surface. It simply isn’t big enough to reflect sounds from the speakers into my ears, provided I sit far back enough to avoid them. Instead of bouncing off a large flat surface, the sound just passes over the front edge and continues downward to the floor. I do lose the transparency when the keyboard tray is pulled out, but that was the whole point of having a retractable keyboard tray–easy access to composing with the keyboard out, and then acoustically-accurate mixing afterwards with it retracted.
First, the rack spaces are too deep, which makes the upper surface holding the speakers deeper and bigger than it needs to be, and the racked gear slightly too far forward. It would’ve been better if the rack bays were 1″-2″ shallower, which would have provided an additional 1″-2″ of space on the main surface, while also placing everything a bit further back towards the wall which would have been a better use of the available space. Because the main surface is so shallow, that extra 1″-2″ would have been really nice to have. It would also have made the back of the racked gear easier to reach.
Second, the wood finish I used really isn’t working out. It’s not too visible in the photos, but the finish is already starting to disintegrate and flake away. I used a water-based polyurethane finish from Varathane, and I followed the directions to the letter, so I’m not sure what went wrong. I’m not a woodworking expert, so it’s entirely possible that I made some newb mistake that I’m not aware of. Maybe applying water-based products onto bare wood isn’t the best practice? I chose that particular finish because it claimed to preserve the natural color of the wood, and at least that claim has turned out to be true. From now on I’ll stick with oil-based polyurethane finishes because I understand better how to make those work.
Third, this isn’t really the desk’s fault, but it’s built around too many compromises because of the small room I am stuck with for now. If the room could accommodate a bigger desk, I could’ve done a few things differently that would’ve offered better utility. For example, there wasn’t enough space to position the display in an aesthetically good way, no matter what. I’ve gotten used to the way it hangs over the front edge like that, but I wish I could’ve placed it on the same surface as the speakers, or had room for multiple displays. Also, it can’t hold all of my rack gear, so I decided to build a rack sidecar to hold the rest of it, which will happen as soon as the weather warms up here.
All that being said, it is a great help when making music. I’m sure that the next desk I come up with will be even more of an improvement to my process.
For the future, I’d like to build standing frames for my acoustic panels, and also redo the fabric on them to look cleaner and brighter. Currently they are covered in fading blue burlap and they are just leaning against the walls, which doesn’t help the aesthetics of this space. But one thing at a time.